Run LLMs on an External NVIDIA GPU Without Local Hardware (Step-by-Step Guide)
This tutorial explains how to run experiments with open-source foundation models (e.g., Qwen/Qwen2.5-7B-Instruct) with external NVIDIA GPUs. All you need is €5–10 and an account on vast.ai. Alternatively, you could use services like runpod.io, or lambda.ai. In this tutorial, I’ll walk you through setting up a GPU-powered instance on vast.ai.
Why choose this approach? With a small investment, you can work directly with core LLM libraries and experiment with open-source models. For example, I own a MacBookAir; however, essential libraries such as unsloth don’t support Apple chips, nor are many other libraries optimized for them. In my experience, Google Colab is less reliable when it comes to GPU availability (even for paid options). It’s also limited to notebooks, which restricts flexibility. Using a remote instance with GPUs is also helpful if you want to prepare your scripts before submitting heavy jobs on a high performance cluster. Finally, setting this up is a fun way to gain some hands-on ML Ops experience.
Create account on vast.ai and add credit
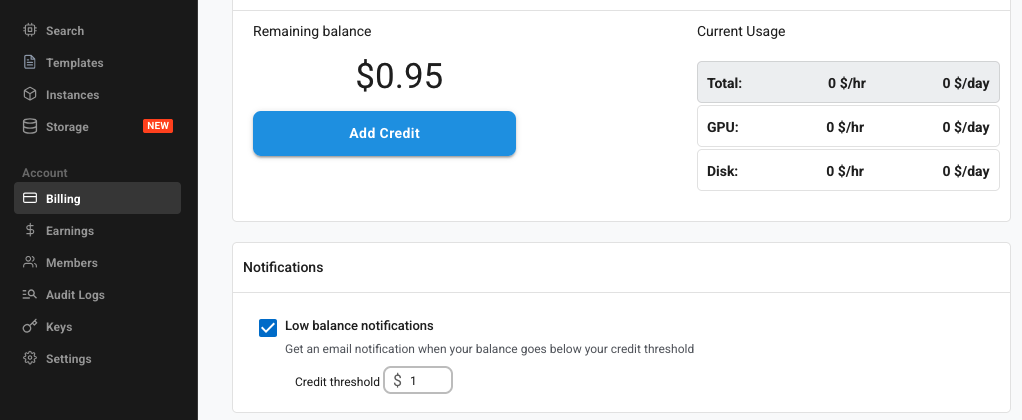
After having created an account on vast.ai, charge your credit with 5€-10€.

Fig. 1: Account page on vast.ai
Rent instance
You can rent an instance immediately by clicking on rent. There are a few technical details to keep in mind to ensure the model runs smoothly. For this example, I want to inference from and fine-tune a Qwen/Qwen2.5-7B-Instruct model, using unsloth. unsloth is a convenient Python library for fine-tuning models; it serves as a wrapper around the PEFT (parameter efficient fine-tuning) package, which is part of the PyTorch and HuggingFace universe.
The instance from vast.ai should therefore have an NVIDIA GPU and a fitting Linux distribution.
I recommend the following specifications:
- GPU: RTX 30XX, RTX A40XX or other RTX; if more compute is needed an A100. The GPUs should have more than >24GB (fine-tuning a 7B model is possible with unsloth; the transformers library would rather require 80GB for the same task)
- RAM: Usually 2xVRAM is best, but at least 16GB should suffice
- HDD: 50-100GB
- CPU: whatever comes with the instance
- Bandwith: At least 100 Mb/s, since you’ll need to download large libraries and models.
Each instance can use a different template. For LLM experiments, it’s easiest to start with the PyTorch template, which comes with CUDA, cuDNN, and many essential libraries pre-installed. This template runs inside an unprivileged Docker container.

Fig. 2: Template on vast.ai
A few tips for selecting the right instance:
- Check that the instance’s resources (CPUs, RAM) aren’t already heavily used. Some servers share hardware, and it’s possible to find instances on vast.ai where CPU cores are busy.
- I’ve had problems with several instances (e.g., they might come with an older CUDA version); just delete them and search for a different one.
- As soon as the instance is being stopped, the system continues to exist and vast.ai will charge some money everyday for storage costs (not much though).
- Once you stop an instance, someone else can rent its GPU. You won’t be able to restart your instance until the other user finishes, which can take hours or even days.
Connect to your instance
You’ll connect to the instance via ssh. The example below uses macOS with zsh, but the setup is similar on other systems — mostly the file paths differ.
Open your terminal and go to your hidden .ssh directory:
cd ~/.ssh
If the directory doesn’t exist, create it in your home folder and set the correct permissions:
mkdir -p ~/.ssh
chmod 700 ~/.ssh
Next we want to create a key, which we will call “vast_ai”, by running:
ssh-keygen -t ed25519 -f ~/.ssh/vast_ai -C "Name or E-Mail address"
from /.ssh.
You’ll be asked to assign a password.
The key pair consists of a public and a private file. We want to open:
cat vast_ai.pub
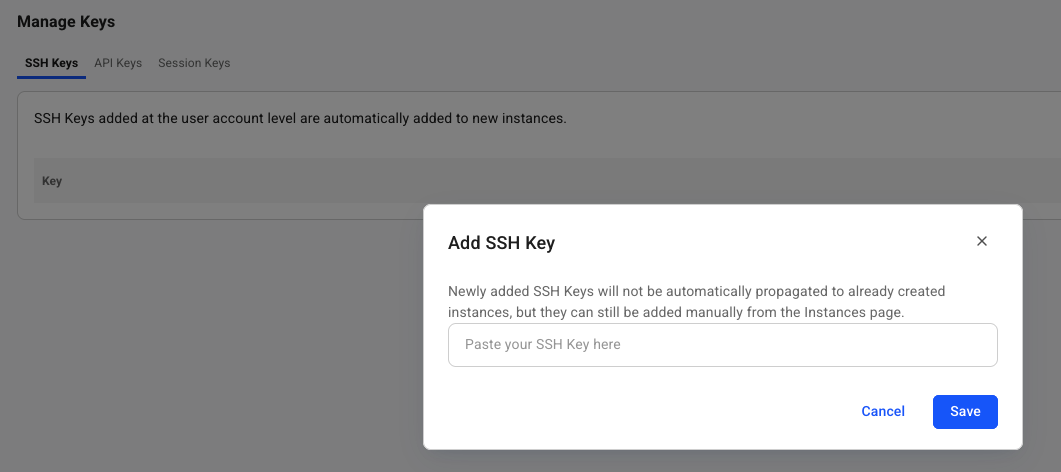
and copy the publicly accessible content. We insert the content on our vast.ai account page and save it.

Fig. 3: Adding ssh key to vast.ai
Next, we navigate to our instance. I’m using the following for this example:

Fig. 4: Instance on vast.ai
If we click on the small key symbol (our ssh key should appear, if not we add the ssh key here again and click on ADD SSH KEY) then the section direct ssh connect appears. vast.ai will show us which port we can use to connect to the instance.
Copy the provided SSH command from direct ssh connect, add your key name with the flag -i, and run it in your terminal:
ssh -i ~/.ssh/vast_ai -p 10532 root@194.26.196.132 -L 8080:localhost:8080
Enter the password you set for the key, and you’re in! vast.ai will automatically start a tmux session for our instance.
Check GPU availability
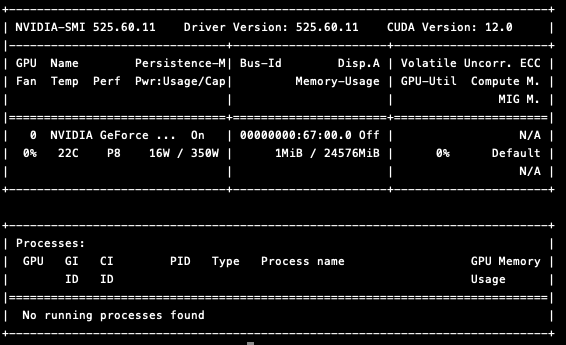
At this point, we can check if the GPU is accessible with
nvidia-smi
We should see something like the following:

Fig. 5: nvidia-smi showing the GPU
If not, for example, if there’s an issue with the driver, the easiest way might be just to delete the instance and look for another one.
Activate mamba environment
Luckily, the instance comes with condaand mamba pre-installed. For this reason, we can simply run the following to create a mamba environment which we can call “test_env”:
mamba create -n test_env python=3.12
After the installation, initialize the shell for the environment:
eval "$(mamba shell hook --shell bash)"
will do it and then we can activate it:
mamba activate test_env
Connect to your instance with VS Code
To make life much easier, we can also connect to our instance via VS Code. To do this, open your local terminal, create an .ssh/config file if it doesn’t already exist, and set the correct permissions.
cd ~/.ssh
touch config
chmod 700 config
We’ll have to add (e.g., with nano) the following information, depending on the instance respectively:
Host vast_ai_instance
    HostName <IP-of-instance>
    IdentityFile ~/.ssh/vast_ai
    Port <Port-of-instance>
    User root
    LocalForward 8080 localhost:8080
Next, we can open VS Code and try to connect to the remote host. The name from the config should appear as an option, when we click Connect to Host....

Fig. 6: ssh to remote host with VS Code
Run python scripts
At this point, we can use VS Code to create new python scripts on our instance. If we go back to our instance terminal, we can install the following packages:
pip install --upgrade unsloth transformers accelerate bitsandbytes
With these libraries installed, we can write a simple Python script (e.g., test.py) that automatically downloads an LLM and runs an inference on a prompt.
from unsloth import FastLanguageModel

model_name = "Qwen/Qwen2.5-7B-Instruct"

model, tokenizer = FastLanguageModel.from_pretrained(
    model_name = model_name,
    load_in_4bit = True, # Load in 4-bit precision to save memory (optional)
    device_map = "auto", # Auto place model on GPU if available
)

prompt = "Explain what a high performance cluster is."

inputs = tokenizer(prompt, return_tensors="pt").to(model.device)


print("Generating response...")
outputs = model.generate(
    **inputs,
    max_new_tokens = 200,
    temperature = 0.7,
    do_sample = True,
)

response = tokenizer.decode(outputs[0], skip_special_tokens=True)
print("\n=== Model Response ===")
print(response)
Simply, run the script in your mamba environment with:
python3 test.py
In my case, the model was saved under /workspace/.hf_home/hub from where we can also remove it, if we want to make space.
Fine-tune model
From here on, you can fine-tune your model with unsloth, using one of their many notebooks as an inspiration: https://docs.unsloth.ai/get-started/unsloth-notebooks
You may also connect to your git repository to save code or data for later use.
Enjoy Reading This Article?
Here are some more articles you might like to read next: